Data Submission Portal
Version 1
October 2020
![]()
CREATE AN ACCOUNT
-
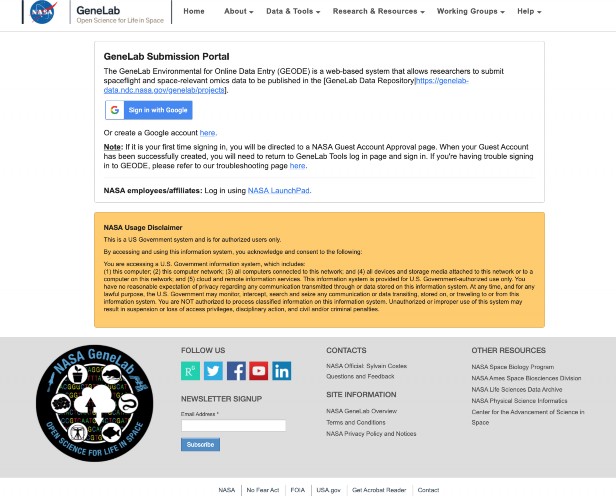
Navigate to https://genelab-data.ndc.nasa.gov/geode-sso-login/
-
Click on Sign in with Google button to register with your Google account. If you have NASA credentials, you can log with using NASA LaunchPad instead.
-
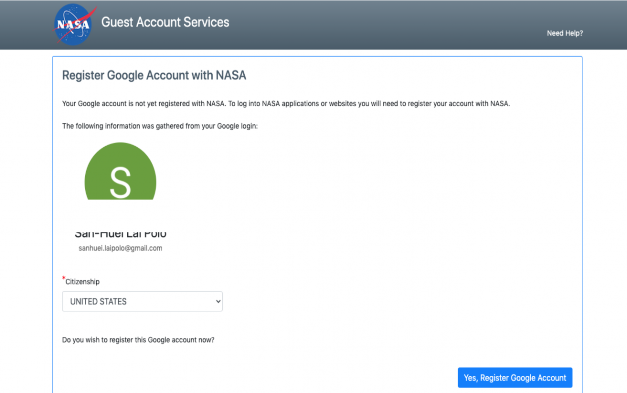
Enter your citizenship and click Yes, Register Google Account.
-
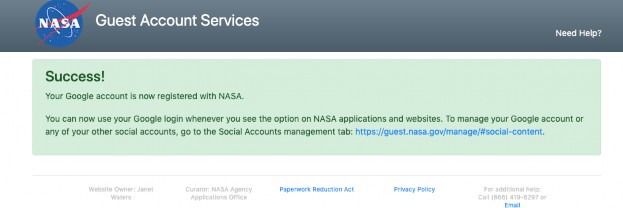
Once you see the success screen, navigate back to https://genelab- data.ndc.nasa.gov/geode-sso-login/ and sign in with your google account you just registered with.
-
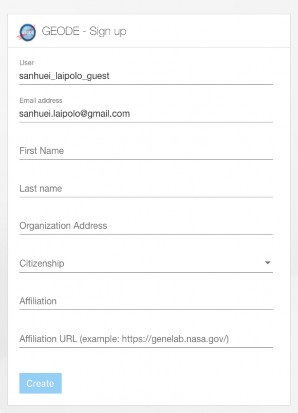
Sign up: all the fields except Affiliation URL are required. Note that some special characters are not allowed, including &<>=.
-
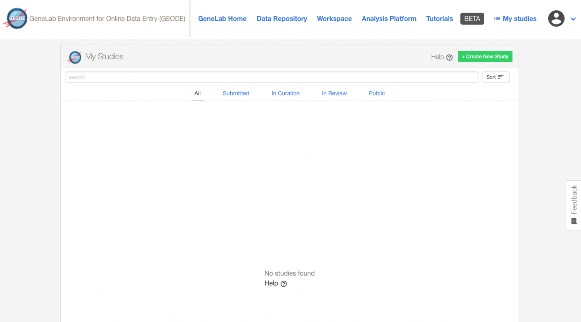
You will land onto My Studies page. All your submitted studies will be listed here. At this stage, your account set-up is complete.
CREATE A STUDY
-
Click

-
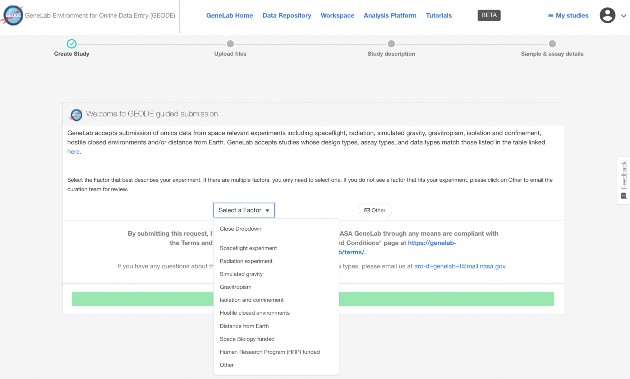
Select a factor that best describes your study from the drop-down menu and click Let’s get started. If you do not see a factor on the list, click on Other to email the curation team for review.
-
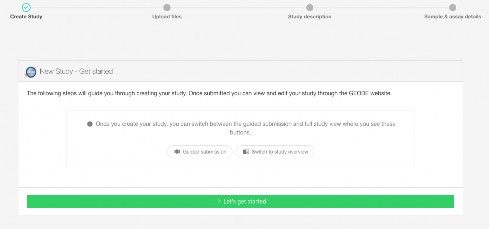
There is nothing to do in the next screen, just click Let’s get started.
-
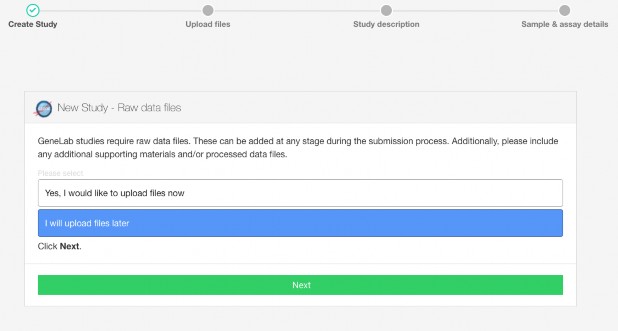
Raw data files are required. Uploading raw data files can be done at any stage, so you can click Next for now.
-
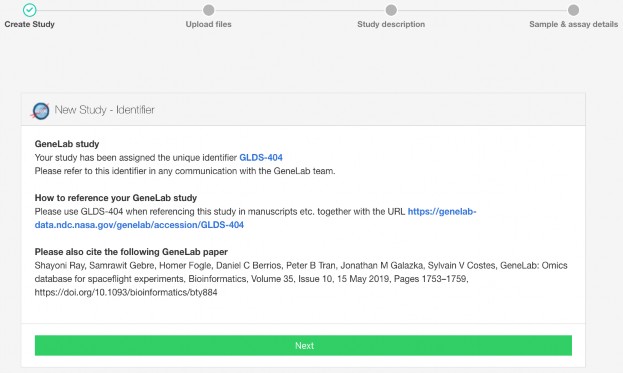
An accession number, DOI and URL are assigned to your study. When you see this screen, a new study has been created successfully.
-
There are two ways to proceed from here, follow the steps in 6.1 to continue with Guided Submission or skip 6.1 to continue with Study Overview. Both will result to the same page later (step 7). Also, you can stop at any point and come back to resume editing if needed.
-
6.1 Guided Submission
-
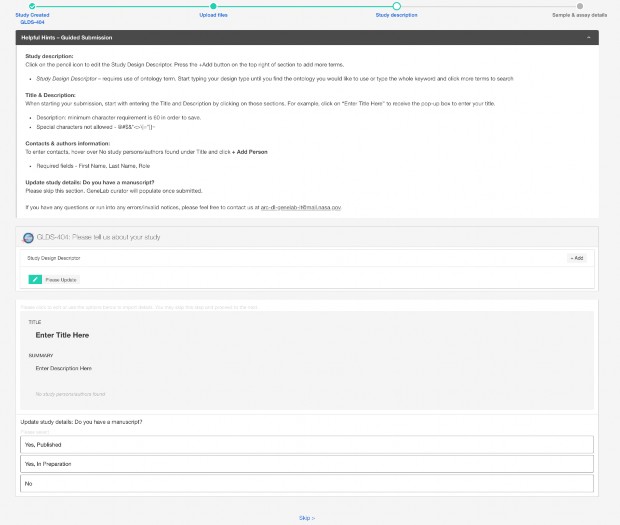
6.1.1 Populate all the fields after reading through the Helpful Hints and click Next.
- Study Design Description: use an ontology if available
- Study Title
- Study Summary: a brief description of the study. You can also enter the abstract of the publication. there is a 60-character minimum for this field.
- Study Contact: the principal investigator and the submitter are required to be listed in a dataset.
- Manuscript: enter DOI or PMID to add a manuscript
- 6.1.2 Click
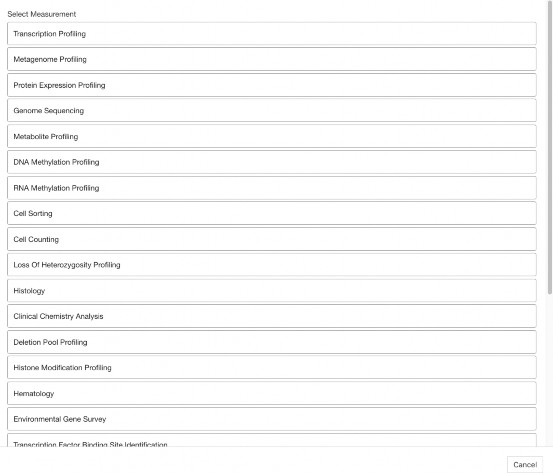
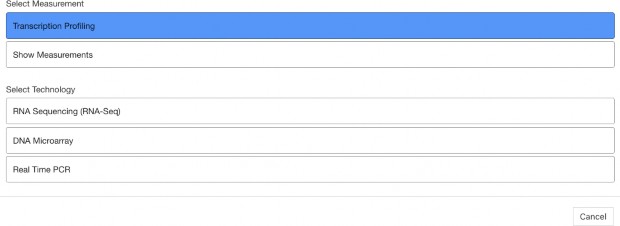
 and select the Measurement, Technology type and Platform applicable to your data. You can also click Next to go to the next step and populate assay info later.

-
-
6.2 Study Overview
-
6.2.1 Click Skip at the bottom of the page (this info can be populated later).

-
6.2.2 Click
 and select the Measurement, Technology type and Platform applicable to your data. You can also click Next to go to the next step and populate assay info later.
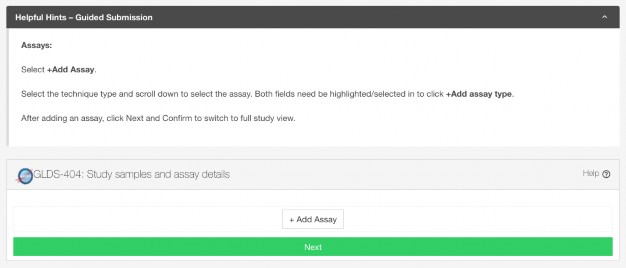
-
-
-
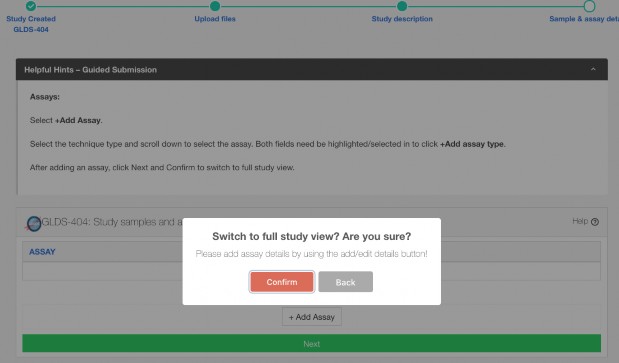
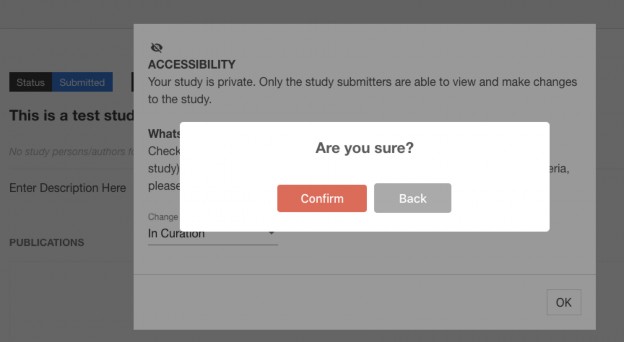
For both Guided Submission and Study Overview, you should see a pop-up screen as the image below. Click Confirm to switch to full study view.
-
Enter study title, description and click
 to list people participated in the study if you have not done so in the previous steps.
-
The principal investigator and the submitter are required to be listed in a dataset.
-
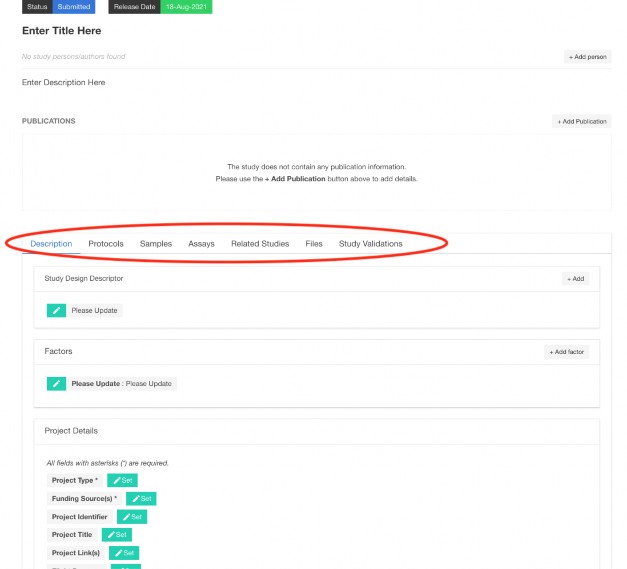
Next, enter all the metadata in various tabs circled in the image.
-
Note that the Release Date is one year later by default. You can click on the date to adjust it if needed.
-
8.1 Description: study design descriptor, factors, project details, mission (for spaceflight study), and data source (if the data has already been submitted to another repository).
-
8.2 Protocols: if you have added an assay in the previous steps, you will find a list of default protocol sections for the assay chosen to be populated. If you haven’t added an assay, you can first go to Assays tab and add an assay then return to Protocols tab to populate all the protocols.
-
8.3 Samples: to populate sample info up until sample collection with one row per sample and select an ontology term if applicable.
-
8.4 Assay: to populate sample info on and after extraction with one row per sample and select an ontology term if applicable.
-
8.5 Related Studies: optional. If the data is related to a public study/studies in the GeneLab repository, you can select it/them here.
-
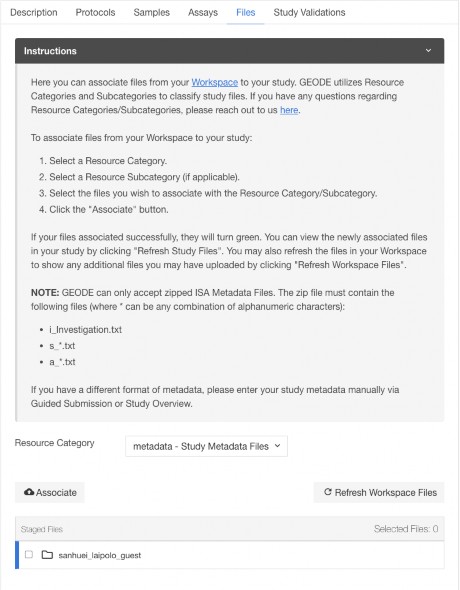
8.6 Files: your GEODE account is connected to your Workspace account. To associate data files, you need to first upload the data files to Workspace. Please provide compressed individual raw data files (e.g. .fastq.gz or .CEL.gz etc.) and do not archive multiple files. See this page, https://genelab.nasa.gov/faq#5, for accepted file types.
-
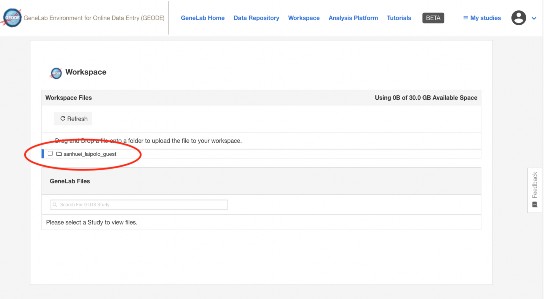
8.6.1 Click Workspace on top panel.

-
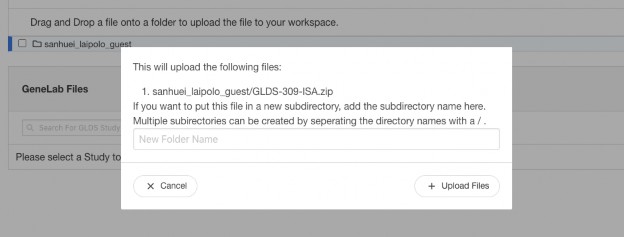
8.6.2 You should see a folder with your user ID. Drag and drop the file(s) from your computer to this folder, and you can choose to save the file(s) in a subdirectory in the pop-up screen, or just click + Upload Files.
-
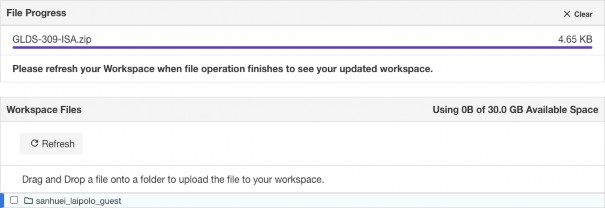
8.6.3 Once the file upload is complete, the file progress bar will be dark purple.
-
8.6.4 Click
 then click on your user ID folder to unfold it and confirm if all the data files are uploaded.
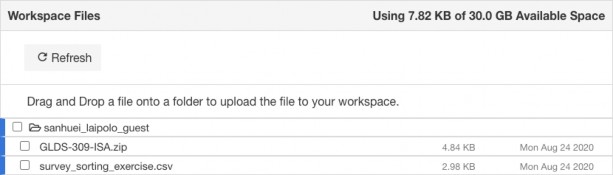
-
8.6.5 The default quota of the Workspace account is 30GB. Please reach out to us if you need more space.
-
8.6.6 Go back to the dataset you are working on by clicking My studies on top right corner and select Study overview under that dataset.

-
8.6.7 Click Files tab and when it finishes loading, you should see your Workspace user ID folder appears under Staged Files.
-
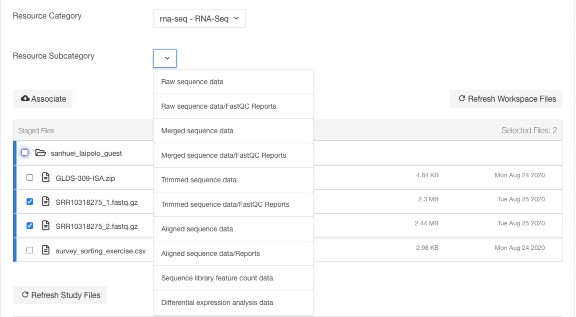
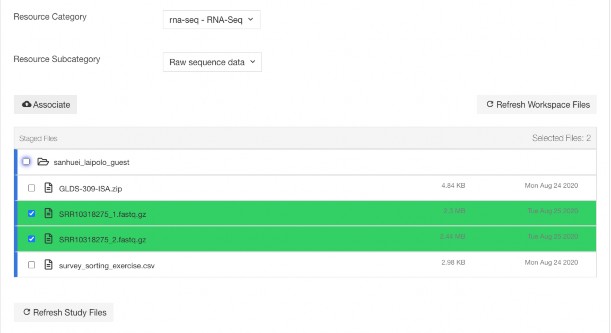
8.6.8 Click and unfold the folder. Select the files and the appropriate Resource Category/Subcategory then click
 .
.
-
8.6.9 The selected files will turn yellow during associate and will turn green once associate is complete. Contact us if the selected files turn red.

-
8.6.10 Click
to confirm all the files are associated. Repeat 8.6.8 to 8.6.10 until all the data files are associated.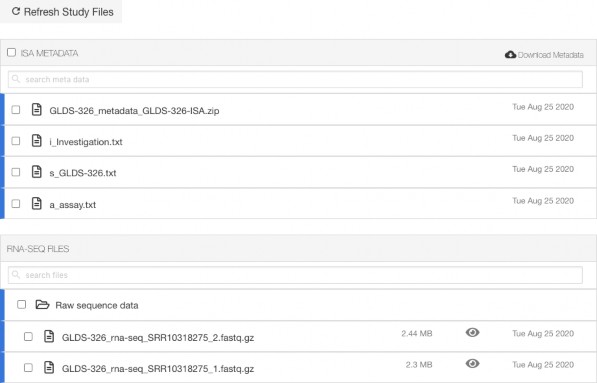
-
-
-
When you finish entering all the metadata and associating all the data files, you can preview the study by clicking
 next to My studies on top right corner.
-
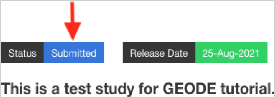
When you are ready to proceed, click Submitted next to Status on top of the study title and change study status to In Curation. Note that once in curation, the study will be reviewed by the GeneLab curation team and in the meanwhile, you are unable to make any changes. GeneLab curation team will contact you to obtain any missing information and make any changes needed to meet our curation policies in preparation for review. A read-only link will also be provided for you to share with your reviewers and/or journals.
If you have any questions or issues, please contact us at arc-dl-genelab-it@mail.nasa.gov.